Monday, April 18, 2011

Our Easter Garden

A few days ago I stumbled across a blog called Embracing the Now. The writer, Erin, had a sweet idea for making an Easter Garden.  I thought it would be a fun thing to do to give the kids a visual while we read and talked about the events that led up to the crucifixion and resurrection of Jesus this week. I had everything on hand that we needed so we got started after we had church on Sunday morning.
Jesus and the Angel standing by the empty tomb.

{*We have church at home usually. Rodrigo leads us in prayer and worship and we take turns reading a selection from the bible that we have chosen together earlier in the week to share with the family. We discuss it with the children, asking them questions to make sure they understand what we have read and allowing them to ask any questions they might have. We also try to have family devotions after dinner every night, but some nights I serve dinner too late, or life just seems to "happen"! But we do try! This week our after dinner devotions have a distinctly seasonal bent to them, as we discuss Jesus's arrival in Jerusalem on a donkey and the people laying branches in his path and singing psalms in his praise, then his dealings with the Pharisees, his parables, his late night vigil in the garden of Gethsemane, his arrest by the roman soldiers, his trial, crucifixion and death and last but definitely not least his glorious resurrection. Which is the basis of everything we believe as Christians!}

The boys loved Embracing the Now's peg people Jesus and the Roman soldiers. So we copied them! (Why mess with a good idea?!) They helped make them and within an hour we had most of the important players for the week! (I ran out of peg people so I'll need to go pick up some more peg people so they can have a couple of Pharisees and Pontius Pilate and any others we come to think we might need.)

Jesus with 2 of his disciples in the Garden of Gethsemane.

Jesus's arrest in the garden by the Roman soldiers.

The angel telling the two Marys of the empty tomb and our resurrected Lord.

Complete (so far) Easter Peg People Cast of Characters. 

The adorable reason one of Roman soldiers has a bent sword! 

At 16 months she is still too  little to understand the meaning behind the story, but she loves the new "babies" and the little garden to play in with them! Several times a day I hear the gleeful cry of "Babies!" and turn to find her like this... :-)

Thursday, March 31, 2011

Home-made Play Dough Color Theory

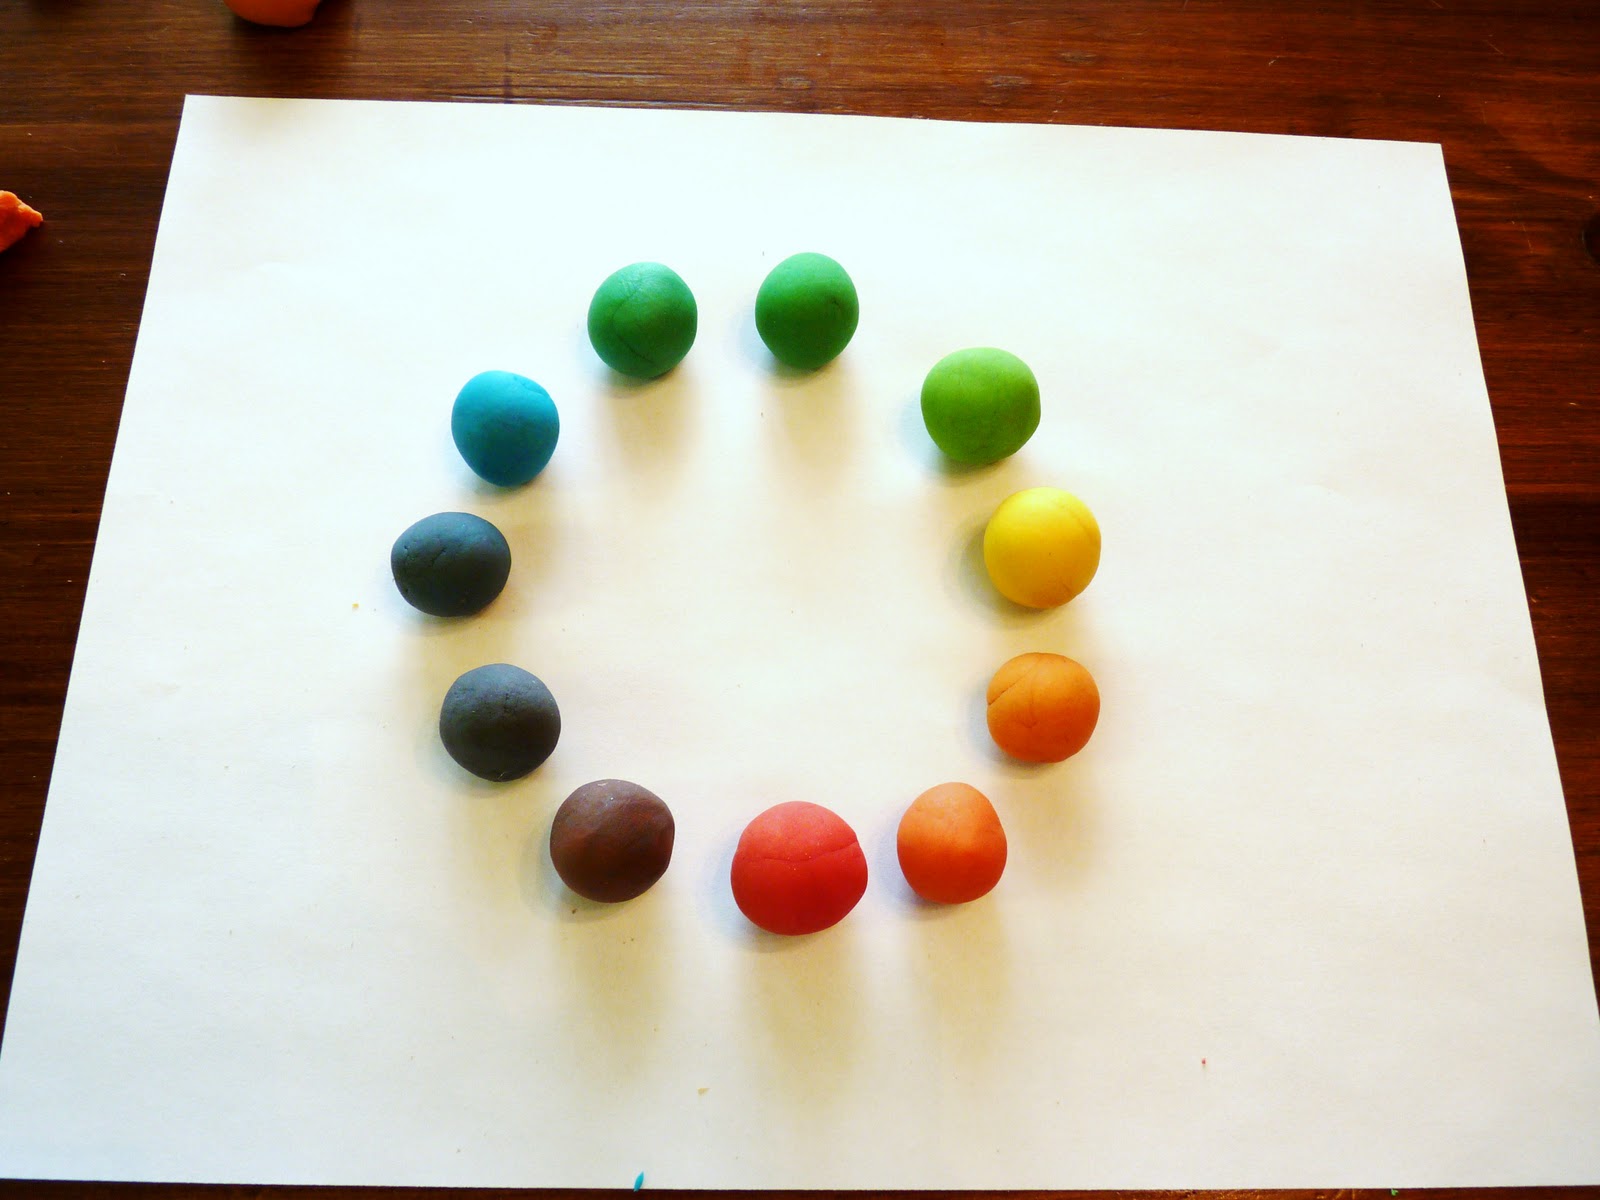
Sometimes I realize that something I have covered long ago in my oldest children's homeschooling was never a topic we went over with the littler ones. Color theory was one of those topics! So yesterday we remedied that little oversight. It wasn't that Ethan (my youngest boy at 7 years) had no idea about what happened when you combined colors, but I wanted to be sure he had a firm grasp on the concept before we moved on to our next (exciting!) art lesson.

First we whipped up a batch of homemade play-dough using the following recipe.
  • 3 cups flour + a little extra for kneading
  • 1/2 cups salt
  • 2 tbs. cream of tartar
  • 2 tbs. vegetable oil
  • 2 cups boiling water
Mix the first three ingredients in a large heat-proof bowl. Boil the water and oil. Slowly add the water with oil to the dry ingredients mixing well. (I often use my large stand mixer for this part... it goes faster!) Once your play dough is smooth, soft and elastic remove it from the bowl and divide it into 2 or more parts to be colored. This time we divided it into 3 balls and used paste food coloring to make our primary colors. You may need to add a tiny sprinkling of flour if it becomes sticky or tacky.

Our three primary colors: Yellow, Red and Blue
Ethan mixing his first two primary colors... So excited! (*Excitement is probably partly due to the fact that this was the first time in his memory I've encouraged the mixing of play dough colors... I'm not sure why I've never really encouraged it. It's not like it is expensive or hard to replace. One of those ingrained things from my own childhood I guess. I remember always being told not to mix my play dough colors... they would get ugly and muddy looking, but boys like muddy and ugly looking sometimes don't they? Plus our mixed colors turned out pretty for the most part. See purple below... not so sure about that one!)
His secondary color emerging...

Primaries and Secondaries
See what I mean about the purple? We tried mixing equal parts red and blue, more red and less blue and vice-versa. But they all turned out weird! My husband thinks it is because our blue looks more turquoise than pure blue... maybe he is right. But still it was purple enough for Ethan to understand the theory of red + blue = purple. And that was the important part, even if it wasn't a very pretty purple!

See our rainbow of colors emerging? Aren't they pretty? Ethan had so much fun making all of these colors! Color Theory concepts learned! Success!
 All of the kids enjoyed (re)learning about color theory. Afterwards we all played with playdough for a while!


 Claire had never played with playdough before. She was thoroughly impressed! She only tried to eat it a few (dozen!) times. She did have lots of fun playing and squishing it through her fat little fingers.


Thursday, March 24, 2011

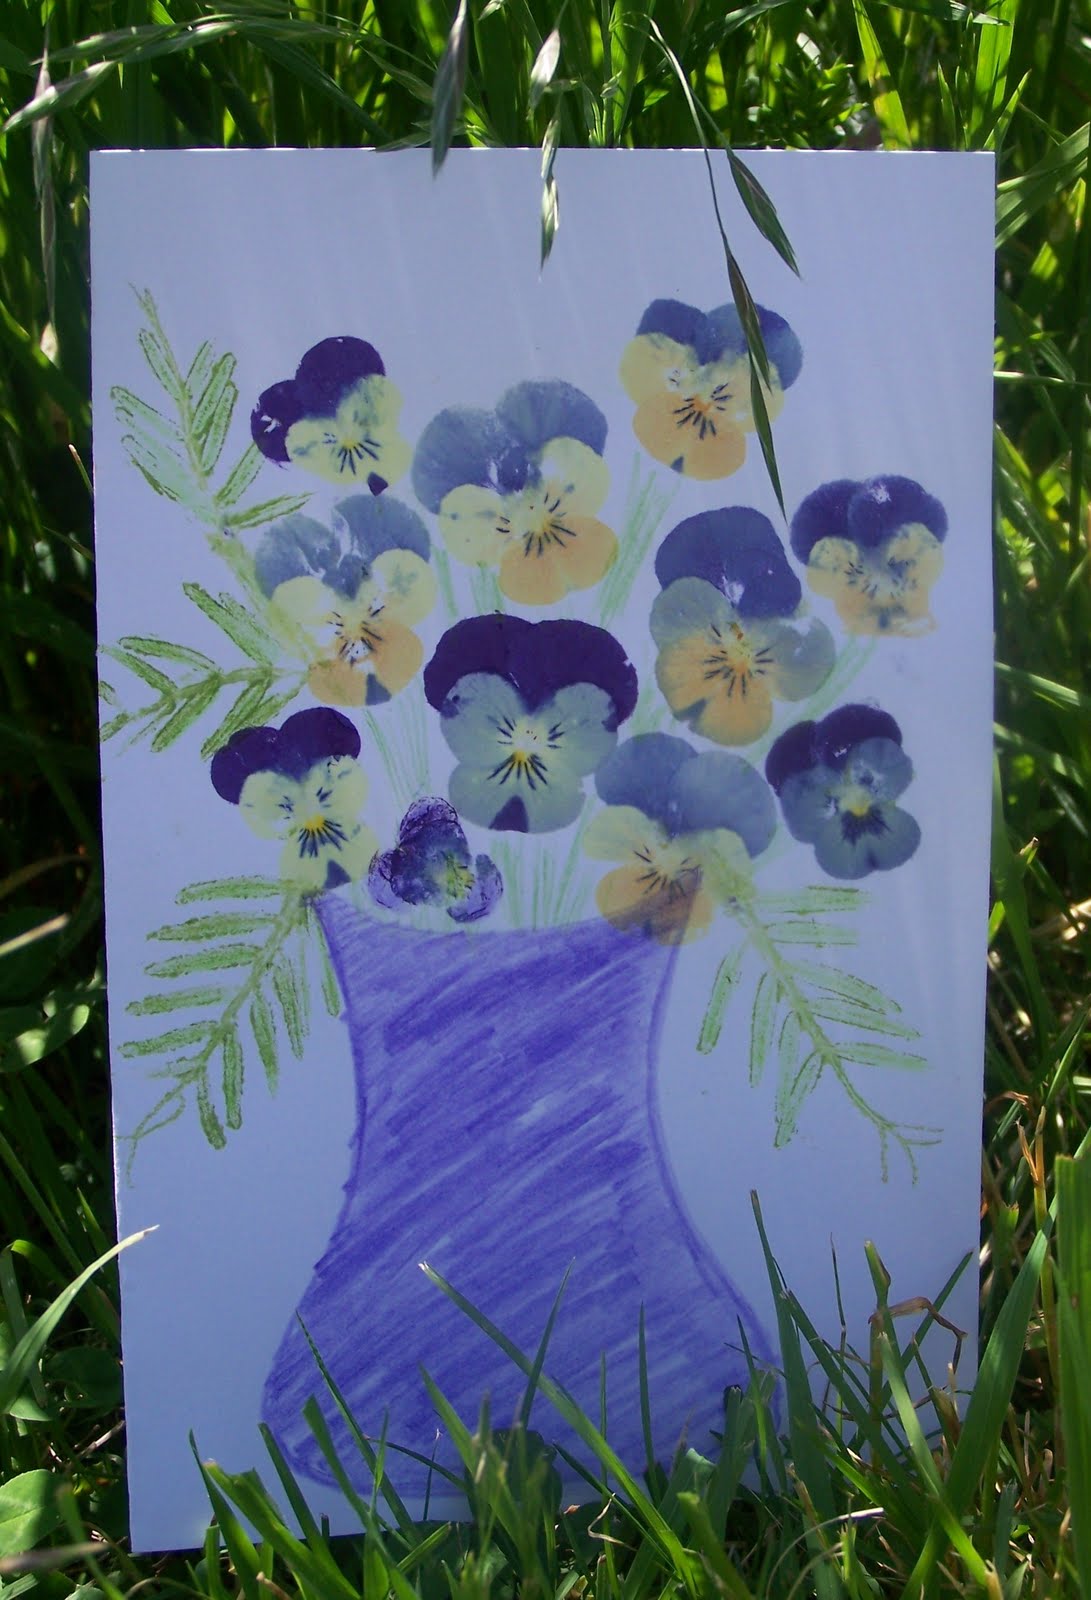
Flower Pounding Card Tutorial

Flower pounding is one of my favorite spring crafts to do with the kids. (Of course you could do it year round but my favorite flowers to use are in bloom during the spring and early fall.)


First you have to gather your supplies. You’ll need paper or something else to use as your background. We were making cards so we used heavy card stock. I wouldn’t recommend normal copy/printer paper as it is probably too flimsy. You can also pound your flowers onto plain white cotton or unbleached muslin and frame your picture.( I’m sure there must be a way to fix the color well enough to become wearable, washable art but I am not sure how. I know that some of you ladies out there, who regularly dye your own wools and fabrics using natural dyes, must know of a way to fix the color, but I just haven’t learned how to do that yet. If anyone knows how I’d love to learn! )
  • Paper or cloth for the background
  • Hammers (one for each person who wants to pound if possible!)
  • A hard flat surface (that won’t be damaged by hammering on top of it)
  • A basket (to hold the flowers you gather)
  • Scissors (to help remove stems and pick flowers)
  • A small scrap piece of cotton fabric (to lay on top of your flowers while you pound) We used an old scrap of a threadbare sheet. You can also use tissue paper or paper towels in a pinch, but the fabric will hold up better to repeated pounding with the hammer.
  • Flowers and leaves!!! (Flat open faced flowers work the best. Pansies and yellow daisies are my favorites. You can experiment with all types and colors of flowers; you might be surprised at what works and what doesn’t. Fern leaves are also beautiful to use in this craft. Colorful fall leaves look gorgeous when pounded too.
  • Pencils, markers, crayons, etc. (to draw and write in your cards)
Now go outside with some enthusiastic children and gather your flowers and colorful leaves. Get lots!
 Make sure you take time to smell the flowers and enjoy being in the sunshine with your precious little ones. Enjoy the feel of the dew wet grass tickling your toes. I always try to remember that I will have these sweet boys under my care for such a short period of time, there is so much fun and learning that I want to share with them before they grow and start families of their own! I want them to have happy memories of their childhood that they will want to recreate someday with their own children.


Once you have a bunch of pretty flowers gathered in your basket you can set to work.


If you are making cards like we did, then you’ll need to fold your paper in half and decide which side you want up and how the card should open. Then lay your paper our flat and carefully place a flower face down in whatever position pleases you the best. If the flower you’ve chosen has a large stem on the back or a very juicy part where it connects to the stem you may want to carefully cut that piece off. I find it easiest to do this by laying the flower where I want it and holding it’s petals in place with my left hand and carefully cutting the juicy part off with scissors in my right hand.
Then without disturbing the petals as much as possible lay your tissue paper (that’s what we used) on top of the flower holding it in place with one hand while you lightly tap on top of the flower with your hammer. Little ones may need your help holding the flower with tissue paper over it while the tap with the hammer. Tap all around the flower, hitting it with your hammer as flatly as possible.

Once your tissue paper looks wet all over on top of the whole flower carefully peel the tissue paper back and peel up the pounded flower.
 And there you have it! Your flower should have transferred all of its pretty color onto your paper. Continue adding more flowers and leaves to your art until you are pleased with the outcome! You can add stems to your flowers by pounding or drawing them on with colored pencils. This craft is as much fun in the making as it is enjoying the final product!


Related Posts with Thumbnails